What to Plant?


There is usually a lull in my gardening about this time of year where I have done my early spring planting and I am starting to consider what to plant for late spring and early summer.  Each year is a little different because around here, the spring to summer transition can be an overnight thing.  We are already consistently in the 80s and although we have had a great year rain-wise so far, last years drought is still lingering on my mind.  Do I skip the late spring and move into summer mode now?

In December I made myself a set of gardening flash cards which list what plants I can plant for the particular month.  I gathered this information from gardening guides specifically for my zone 9a.  Here are the choices for April :

Beans, cantaloupe, collard greens, cucumber, eggplant, mustard, okra, peppers, sweet potato, squash, tomato, turnips and watermelon.

I already have the number of cucumber, peppers and tomatoes that seem reasonable for my garden.  Mind you this hasn't stopped me before in acquiring more.  Some years there are just the incredible plants looking at me from the nursery or feed store and it is exactly like looking at puppies in a pet store.  "Look how cute they are! Oh, I have to take them home with me."

Luckily this kind of conversation happens only in my head - so far.  Suffice it to say that sometimes the plant space requirement needs are not taken into consideration at this time of year.  It isn't entirely my fault.  After all, the baby and juvenile plants look nothing like the gargantuan adult plants they will become.   It just looks like everyone will get along just fine until they are at each others vegetable throats with massive amounts of growth.

It won't be long before I start to find the volunteers.  These are typically cherry tomato plants and they will start to crop up all over the place from now through June.  My plan for these little rascals is to strategically position them around the edges of the garden beds and let them sprawl out so that Farmer Westie can satisfy his gardening urges.

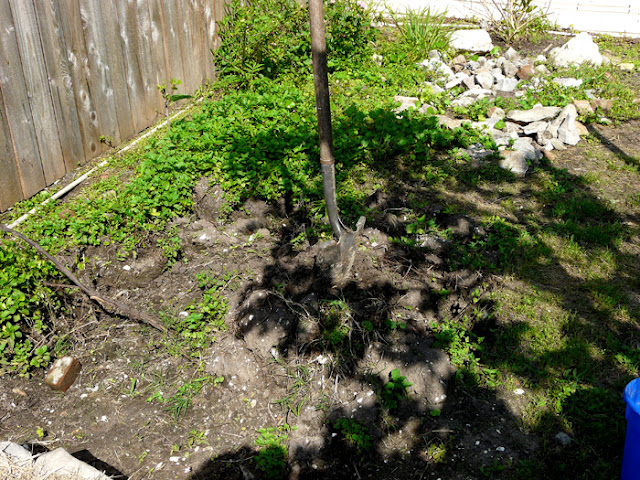
As far as open gardening space I have one six foot by three foot bed and one three foot by three foot bed completely empty.  I also have one bed partly empty that is currently housing my mustard greens, collards and turnips.  There is also a space that could conceivably become three more six foot by three foot beds if I somehow develop super human strength and the weather throws us something other than hot, humid and rainy. 

Here is my basic plan for this weekend:


Okra 
There are a half dozen of Green Velvet okra seedlings waiting to be put into the garden bed.  These guys will supplement the dozen Clemson Spineless already growing in the center garden bed.

Beans
Although there are already a dozen bush bean plants already blooming, I want to plant some more seeds in order to extend the harvest.

Sweet Potato
I don't actually have the sweet potato slips to plant yet, but I am going to suspend a sweet potato in a glass of water and when it sprouts I will use the slips to plant my sweet potato bed.  Either that or I will give up in frustration and purchase some slips like I did last year.

Watermelon
Now we planted cantaloupe last year and had some success, so this year we are thinking of trying watermelon.  This would necessitate finishing out the as of yet unformed garden beds which makes this more of a pipe dream right now.

Eggplant
To eggplant or not eggplant... that is usually the question that plagues me about now.  The first year I tried growing eggplant I had phenomenal success.  Dozens of perfect eggplant on lush and attractive pants. That was both a good thing and a bad thing since every year since then has been less than stellar results with wimpy plants and few fruits.  I kind of resent the eggplant for leading me on like that.

Squash
It would be absolutely wonderful to try out more squash varieties in my garden except for one thing...
... this gal.  She may look cool with her red torso and dashing black wings, but  her offspring create this:
These poor squash plants are wilting because a squash vine borer larvae is eating a cavern into the vine.  These pests can turn a vibrant and prolific squash plant into a wilted mess in just a couple of days time.  Supposedly you can open up the vine and dig the larvae out which I tried last year and indeed the plants stopped wilting.  However, they also were so traumatized they stopped producing fruit as well.  I try to deal with it by planting squash as early as possible and giving up when the borers start doing their thing.  Better living through surrender in this case.

We will just have to see how much of my plan I can get accomplished or if the forces of nature such as rain, mosquitoes, heat and humidity will chase me out of the garden.  Or it could be a nap.  Never underestimate the power of a nap.  Those things can pull you out of a garden plan faster than just about anything.

Okra odyssey


Last year our okra plants were out of this world in robust productivity.  I planted about 15 plants into our horseshoe shaped grapefruit tree bed and they loved it there.  Of course we had a few minor issues at first, the most notable was that the resident Border Collie failed to see why she could not just hurl herself through this bed several times a day, knocking over and crushing the little plants.

My solution to the 'dog hazard' was to make circular cages from short pieces of wire fencing.  These little cages stood at most about 2ft tall, but they were exactly what was needed to dissuade the rampaging Border Collie.  Unfortunately for her, she failed to notice them the first day they were up and hurled herself into the garden with her normal robust vigor.  I was in the garden and I heard a loud "Ooof!" - but fortunately not a yelp.  You can be sure I checked her over for any scratches.  We always make sure there are no sharp edges or poking tines to any of our garden installments due to oblivious Border Collies. Life is better when you have puncture free dogs.

The wire cages are hard to see but this is what it took to make this garden bed Border Collie proof.

So the little okra cages did the job and even seemed to lend some support to the gangly okra adolescent plants.  Mind you, I had to frequently extract leaves that got caught in the confines of the cage when they were all at a certain height and putting out their first adult sized leaves.  Once they were past that stage the cages provided continued protection to their trunks.

 Here they are at around four feet tall and less than half their eventual size.

This was good because it turns out that okra is some sort of doggie lure.  Our Westie has long been an okra connoisseur, especially to the long tough inedible things okra pods become if you forget to pick them for a day or two past their prime.  Not only did our okra patch provide us all with food but also a constant supply of home grown dog toys.

According to the resident dogs, this is a lure, food and toy all in one.
Once your dog knows that something he or she wants grows on a plant in the garden, then good luck in convincing them to leave that plant alone.  This was especially true of the Westie once he discovered cherry tomatoes.  He would watch me picking them and I like a good Mommie would give him a fresh picked tomato.  He being no dummy began to harvest his own which resulted in us having to fence off all the tomato plants one year.  Being naturally color blind he could not see which tomatoes were ripe and it always took him a few tries before he understood the smell of the ripe ones in order to make the best selection.  This meant he would pull off any tomato, cherry or other types before they were ripe and then act disgusted with the results.

What a ripe cherry tomato looks like to you and I.

What a ripe cherry tomato looks like to a Westie (color not as vibrant).

Last year we put our tomatoes behind the dog proof fence, but planted about a half dozen volunteer cherry tomato plants where the dogs could get to them.  Farmer Westie was in heaven and when his crop began to come in I took time to re-instruct him on which ones were ripe.   After that he would check his plants every day smelling for the ripe ones and picking his crop.  The Border Collie, being no dummy herself watched his every move and soon she too began to look for ripe tomatoes.

What a ripe cherry tomato looks like to a Westie nose.

Farmer Westie also remembered the okra pods from years past and began paying special attention to the juvenile okra plants.  He found that if a branch from the okra plant was just the right height, he could pluck off his own pod.  It took me a couple of days of looking at these truncated okra pods before I figured out what kind of disease was affecting my plants.  It was a bad case of "Westie-blight".

What the immature okra pod looks like if it survives the onslaught of dog.
His interest aroused the interest of the taller Border Collie who discovered that okra flowers taste great - this again took me a few days of trying to figure out why we weren't having any new pods and why all the petals were falling off the okra blooms.  A bad case of "Border Collie-bloom rot".


This year I have wised up - no matter what happens to the okra plants I am going to blame it on the dogs.

Ahhh -qua!


Well, the waiting is over and we have - so far - water in the pipes and no leaks.  Mind you there was a stall when I noticed we forgot to glue one of the connectors, but a couple of hours of drying later and I was able to flush the system.  This meant going to the farthest of the garden valves and opening it up.

Phew! What a horrible vapor and no doubt toxic resin water came pouring out.  I strategically positioned a pail under the spot to gather the evil water and toss it where nothing is growing and dogs are not allowed.  After the water cleared a bit (four pails later), I went to each of the new hose bibbs and garden faucets and ran a couple of gallons from each.

Finally the lines were clear enough of glue residue and trapped dirt they would not harm the new soaker hoses.  Yesterday while waiting for the watering system to dry, I positioned four of the soaker hoses into various beds.  Now I could hook them up and get my first idea of how they were going to work.

I have to say that in order to get your soaker hose just the way you want them, you will need to secure them with some sort of landscape pin, or in my case, thick wire cut into a U shape.  So far the hoses are all working just fine, but I will need to experiment with how much to turn on the faucet and how long they should run.  One of the beds seemed to immediately become saturated and ran water into the pathways.  I think the problem was just part of the hose too close to the edge, or maybe it had too much water pressure.

The other thing is that I have two types of drip hoses.


In this corner we have the Gilmour Flat Soaker Hose:
I like this hose because it is easier to position but I am a little worried that it might be susceptible to crimping and sending less water to areas along its length.  We shall see...

 In this corner we have the Swan Round Soaker Hose:
This guy is a real pain getting set into place, but it delivers a consistent amount of water throughout its length and seems less likely to crimp.  My worry is that the material might be a little fragile.  We shall see...

So, much like everything else in my garden, the soaker hoses are in competition with one another.  The prize for the victor is more of their kind added to the garden.   So Gilmour and Swan - let's see who wins my love and who becomes yet another story of garden gadgets gone bad.  Stay tuned...

The Watering System


 There are some things in life you just don't know you desperately need even though they are looking you square in the face. For me, a watering system was one of those kind of things. It is sort of odd that although I knew spending an hour and a half watering my garden was an excessive use of time better spent on other things and although I knew such things as watering systems existed, I never considered that I could have such a thing in my life. “No, that's okay, keep your delicious steaks. I will just be contented with my runny gruel.”
I guess in part I thought that installing a watering system would be both difficult in application and expensive. That is true in many situations. It can be extremely expensive if you have someone else install a system. It can also be expensive depending on the type of system you choose. However, an inexpensive and relatively easy to install system can be created for almost any gardening situation.
When I became convinced that I could no longer live without some sort of automated way to water my garden I began to research my options. My husband was a big proponent of getting water to where we needed it without using garden hoses. He and gardening hoses do not get along. Not only does he dislike the way they are either always in the way or alternately hard to reach, the hoses seem to have it out for him as well. They like to trip him up. They like to slide into a patch of puppy poo so he gets and inelegant surprise when coiling the hose. They like to kink and twist and grab hold of various rocks or projections along pathways in order to make him backtrack when trying to move them from one place to another.   

They only look like this when you first bring them home...

And this just brushes the surface of what manner of evil garden hoses can create when you consider the sprayer nozzle. Every year we in desperation purchase yet another sprayer nozzle hoping for just one thing – that the blasted thing will spray outward versus what always happens which is they dribble water down your wrist. Incontinent spray nozzles are one of the banes of my existence. It isn't just that having water dribble down your wrist is such a horrible thing in itself, but rather this makes it nearly impossible to be wearing gloves while you water. If I water the plants my glove will get soppy which makes it rather useless as a glove. So there I would be with my glove/sponge which makes my hand filthy which pretty much defeats one of the main reasons I wear the glove. What is that you say? I could take the glove off. Well yes, and that is what I do, but as I have mentioned in another post, I am a mosquito magnet. Nothing quite pisses me off as much as having mosquito bites on my hands and wrists. To get past the mosquitoes I try to move quickly and wave my hands around as much as possible which I am sure makes me look like some sort of deranged puppet dancing to invisible strings, and much more importantly makes it very difficult to provide water strategically. The whole benefit of hand watering is that you provide water specifically to each plant instead of to a large surrounding area.

The dribbler...


Before the drought days in our garden we would water the entire garden with a oscillating sprinkler. This is a great thing if you are not trying to conserve water. Your plants love it, the neighborhood birds love it and so do the weeds. It is like you are creating rain whenever you want to. This unfortunately is the least effective and most costly way to water your garden. It also involves dealing with oscillating sprinklers which are near cousins of spray nozzles. Now an oscillating sprinkler does not dribble water down your arm – oh no, it wouldn't stoop to that. Not when it can blast your entire body as you rush out trying to time its spray just so you can modify its oscillations. These type of fan sprinklers also like to flop over so they will be pointing directly into the ground and sort of drilling the water into the earth. When you rush out to upright them chances are you will end up with an exhilarating blast of water up your nose. Ah how I miss the oscillating sprinkler days.

They look so peaceful when they are sleeping...

 Now considering the following: 1) garden hoses that need to be replaced every couple of years or so; 2) spray nozzles that need to be replaced every year (sometimes they take an unfortunate header into a rock or hammer); 3) oscillating sprinklers which have to be replaced every year because the break when you trip over them or hit them with the mower because they were buried in the tall grass; 4) a large water bill because you are using more water than you need due to over-spray and evaporation; The conclusion we reached was that minus these expenses we could well afford a reasonable automatic watering system.
My husband had already brought water to the entire perimeter of our yard via pvc pipe in order to allow us easier access to water spigots and allow for shorter lengths of water hose to reach the entire yard. Our first idea was to simply put in several upright risers with sprinkler heads attached to them. We found the sprinkler heads very affordable at the big box hardware/lumber store at around $2.50 each. We also found this thing called a sprinkler head converter that would allow us to change the system to a drip irrigation system. The isle the sprinkler heads were on was filled with various gadgets for sprinkler systems and drip irrigation. Bin after bin of little things that served various purposes, all of which became overwhelming.
We left the big box with a couple of things and set home with a basic idea in mind. We would put two sprinkler heads into each of the ceder fence beds. One head would be at the south end and one head at the north end. The sprinklers were adjustable so they would not exceed the 3 foot width and between the two of them we would have full coverage. Excited with our plan we began to put it into effect. One of our goals was to make this system as attractive as possible, so we endeavored to bury the pvc pipe. No worries here. I just dug a trench along the long edge of one bed and then inward from the north and south ends of the bed to their center. The idea was to run a common pipe between two beds which would branch to each bed at the north and south ends. This way we would have a system master control for every two beds. The problem was placing the pipe at the north and south ends. Having already established beds with wooden walls, it was hard to get the lengths of pvc under the bed walls. We managed and would have attached everything but we were chased out of the garden by several days of hard rain (yes, I did consider it ironic that rain was stalling our endeavors to bring water to our garden).
During our rain delay I perused the internet and became more interested in drip irrigation systems. This method was the gold standard of water systems. First of all, this type of watering does not get the leaves of plants wet. Wet leaves is one of the key reasons some of our plants wither and die due to opportunistic molds, fungus and mildew. It is bad enough we have nearly 80% humidity most of the year. The last thing those plants need is further wetting. The second wonderful thing about this type of watering system is that it is hidden. No risers or sprinkler heads visible and lush non mildewy plants? Sign me up! The third and most wonderful thing about drip irrigation systems is that they are nearly impervious to water loss through evaporation and you can specifically water an area by the way you align the drip lines.
Of course all this wonderfulness about drip irrigation systems was hampered by the fact they are expensive on the magnitude of about $20 extra per bed. With over a dozen beds we wanted them for the price was prohibitive. It turns out you can't just put in a drip line hooked to your regular water line - oh no – you have to have a filter to keep all the crud out of the little drip lines so they don't clog. You have to have a water pressure reducer to bring your water pressure down to the delicate level of those drip lines so they don't explode – and you must have a return preventer so the lowered water pressure does not backwash nasty things into the water for your house. It is probably one of the most OCD type of watering systems there could be.

Just imagine dollar signs above each of the descriptions...

 My husband rescued us from our dilemma by proposing we could use regular soaker hoses. Now the difference between a soaker hose and a drip irrigation system is one of size of hose mostly. A drip irrigation system is tiny little lines, sort of like a Barbie funhouse sort of thing. Soaker hoses are 5/8 inch regular garden hoses except they are porous. Hooking them up would be as complicated as hooking up a garden hose – no need for a fancy emitter. I was not entirely convinced we would not need some sort of pressure regulator to reduce the pressure in the lines. I kept reading reports of people getting busted soaker hoses because the pressure was too high. Mostly I was reading these reports from places that wanted to sell me pressure regulators. Then bless the internet and humanities willingness to share, I ran across a gardening forum where someone said, “Just turn the spigot on a quarter turn to keep the pressure low enough for the soaker hose.” Tada! Pressure problem solved.
We went back to the big box store with renewed purpose. Now our goal was to have a single spigot for each garden bed upon which we would attach a 25 foot soaker hose. The hose would be more than enough to wind through the 3 ft by 6 ft bed and give every plant and every configuration of plants a water supply. We gathered together our needed things:
spigots called hose bibbs for each bed, 

spigots called garden valves for high risers every three beds, 


½ inch pvc pipe (it comes in 10 foot lengths), 


smooth slip T heads for each spigot riser, 


90 degree elbows with one end smooth and the other a female threaded end to attach the spigots to the riser (every three beds we had a high riser leading to a regular garden valve. We decided to use that riser for the hose bibb as well and this required a T head with two ends smooth and the third end a female thread),


connectors to attach the long lengths of pipe,


and pvc cement to put it all together.


Here is our basic plan:


 The PVC pipe coming from the left brings the water supply.  The pipe is cut and a T-head is inserted allowing for a short riser of cut PVC to be inserted.  The riser is topped by a threaded 90 degree elbow which allows a Hose bibb to be attached.  This will be turned to face into the garden bed.  The PVC pipe continues to the next bed where this scenario is again repeated.  At the third bed, a short riser is topped with a threaded T-head, the threads allowing a Hose bibb to be attached.  Above this is another short piece of PVC which is topped with a threaded end cap and a Garden valve is attached.  This allows us to use a garden hose without disconnecting the soaker hose system.  Below is a graphic showing the various configurations of the soaker hose.


An actual photo of the system shows how the short risers and hose bibbs are angled into the garden bed:


The whole system runs the back of our garden beds and so far we have brought the system into 10 of our beds.  The four remaining systems will be added when I finally have enough energy to create the four remaining beds.  


 The PVC pipe is continued to the back of the property and turns the corner continuing to another couple of tall risers with garden valves which we use in the back compost area and the center garden beds.  I am really upbeat and excited about what we have accomplished.  It did not take us very long to get this far with it and once we can verify the pipes are not leaking we will bury the PVC and create a smooth walkway in the back of the garden.  
Probably one of the reasons I am the happiest right now is because we have yet to turn on the water to the thing.  I find I am the most content with my virtual reality.  Once we add the actual water I may be posting how awful it all is, but for now I am ridiculously happy.  Better living through ignorance.

The garden March-es on...


 Just a couple of months ago I was breaking my back getting all my garden beds prepped for Gardening Version 2012 and I am excited to report that now in March – I am still breaking my back getting all my garden beds prepped for this year.
Don't get me wrong. There has been some progress. I went from having a mere four completely redone 3ft by 6ft ceder fence garden beds with their 22 inch pathways on all sides to now ten. I transformed the center garden from three east/west facing rows into two north/south facing rows and additionally created an extensive rock pathway within this bed area. I completely remodeled the grapefruit bed from a single massive horseshoe shaped bed into three manageable beds. I also have planted most of these beds and have harvesting radishes and mustard greens.
Yet even though it seems like I have done a lot there is much, much more that needs to be done. Currently we are installing a watering system that will allow us to have drip hoses in every one of the ceder fence garden beds. Now I know when you just read that it did not have the impact on you that it has on me. Just seeing the words 'watering system' much less 'drip hoses' makes my heart beat faster.
Perhaps I should explain. Last year, what with the relentless drought and 100 plus degree temperatures I would spend somewhere around an hour and a half every morning just watering my garden. An hour an a half I could have been oh, I don't know, maybe sleeping or weeding the garden or harvesting the massive amounts of produce or performing basic hygiene. As it was I spend an hour and a half just watering and then pretended I didn't see the weeds, snatched the fruit and vegetables off the plants and did the bare minimum hygiene stuff necessary to make sure people were not offended by my presence.
I have a dream and it goes like this. I get up at a reasonable hour, saunter out to my garden where I turn on my 'watering system' which starts all my 'drip hoses' and then I leisurely weed the garden, pick the abundant produce from the thriving plants and luxuriate in a long hot shower before I casually look over my water bill and laugh because it is so low. I like the virtual watering system very much. It almost seems a shame that we have to actually install it because that is sure to put some wrench into the works in some annoying way that we can't foresee because you just don't know what you don't know. But I have tonight before we turn it on for the first time, so I am still living the dream.
I thought I would provide an introduction to each of the beds to have as a reference for later in the year. These first group of garden beds are in the ceder fence area that is protected by the dog-proof fence.

Ceder fence garden bed number 1 - "Herbie"
This bed is only partially planted because many the wonderful seeds I lovingly pressed into the soil refused to sprout. Currently it is home to cilantro, a mixture of salad greens, fennel, basil, and curled parsley.

Bed number 2 - "Leeky Creole"
At the north end of this bed is one of the Creole tomatoes we are trying this year. Supposedly this tomato will set fruit in hot humid weather. The rest of this bed is filled with yellow onions, leeks and garlic.

Bed number 3 - "Big Boy"
The north end of this bed has a Big Boy tomato plant. I consider all of the tomatoes in competition with each other, so we will see how this guy stacks up to the other contenders. I should mention that I am trying a new tomato restraint system this year since last years 'lash the tomatoes with string between several bamboo poles' was a horrible, horrible idea. This year I am using a C shaped cage of dog fence which I will increase in height as the tomatoes get larger. Perhaps this will be the year I will find my tomato caging solution. This bed also has a couple of cabbages and two different sweet peppers, a Gypsy and a Sweet Banana. There is also an extra cucumber plant snuggled in next to the tomato cage.  The pots along the side of this bed are several fig trees we sprouted last year.  They are awaiting distribution to their new homes.

Bed number 4 - "Bunny the Quick"
This bed is almost identical to bed three except that is houses the tomato “BN444” – some sort of determinate hybrid. I like this tomato since it has won the 'first to set fruit' award. I like it so much that from now on I am giving it a proper name to replace it uninspiring clone sounding name. I will call it Bunny the Quick from now on. The south side of this bed has cabbages, sweet peppers and another orphan cucumber plant.

Bed number 5 - "Cornie Creole"
Okay, again this is a tomato at the north and cabbages, sweet peppers and orphan cucumber at the south, but this tomato is another Creole and these sweet peppers are a Corno de Toro and a mild Tam Jalepeno.   

Bed number 6 - "Burpless"
This bed still needs its trellis to support the hybrid burpless cucumbers it is holding. This type of cucumber is a miraculous beast that just laughs at powdery mildew that kills off all the other cucumber types I have tried. It also is a workhorse in production and soon, very soon I will be asking myself just why I planted so many of these plants. The cucumber orphans are of this variety which means that very soon we will be discovering just how many cucumbers we can consume in a single day without ill effect.

Bed number 7 - "UnYuns"
This was the first bed I planted and if you looked at my earlier gardening post from January you will see the onions have valiantly rebounded from their ravishing by the opposums. The onions to the west of this bed are yellow and the east side are red. The center of this bed are scallions and at the very back are garlic plants.

Bed number 8 - "It's not easy being greens"
This bed is hosting collard greens, turnips, mustard greens and until recently, radishes. It is also being plagued by snails and caterpillars which are making lace of the leaves. Soon though I will find my organic slug and snail bait and my caterpillar BT powder and this bed will feel much better.

Bed number 9 - "Butternut"
These guys are butternut squash and if they do what their family members did during the fall garden then we will have a whole bunch of very large squash on plants that will try to overrun the entire ceder garden area.

Bed number 10 - "Pickles"
Here are some more cucumbers, but these are pickling cucumbers. I actually purchased these before I was able to find my burpless hybrids. They are supposed to be hardier than other types of cucumbers, but they will have to prove themselves.  Regarding as to why this bed looks like it is out of the Flintstones cartoon.  I found myself with an abundance of energy and a lack of correctly cut lumber.  We have a whole bunch of rocks we have collected and I decided to use them as a temporary holding wall to shape the bed.   

The great beyond...


This is a picture of what is yet to come. It may look like a bunch of dirt and rocks, but this is proto-garden. This will become four more beds in the not too distant future, baring early excessive hot weather, my body  giving out, or me actually coming to my senses. The plan is that this area will be for the wildly vining things like cantaloupe and watermelons.
Stay tuned...